Fern ferns illustrations repp
Table of Contents
Table of Contents
If you’re looking to draw a silver fern but don’t know where to start, you’re in the right place. Drawing a silver fern can be a fun and rewarding experience, but it can also be frustrating for beginners who don’t know the steps. In this article, we’ll break down exactly how to draw a silver fern step by step in en_us language, so you can create a beautiful piece of art.
When it comes to drawing a silver fern, many people struggle with getting the shape and details just right. It’s important to understand the anatomy of the fern, as well as the shading and texture, in order to create a realistic image. Additionally, some people may feel intimidated by the process and worry that their drawing won’t turn out well. However, with a little patience and practice, anyone can learn to draw a great silver fern.
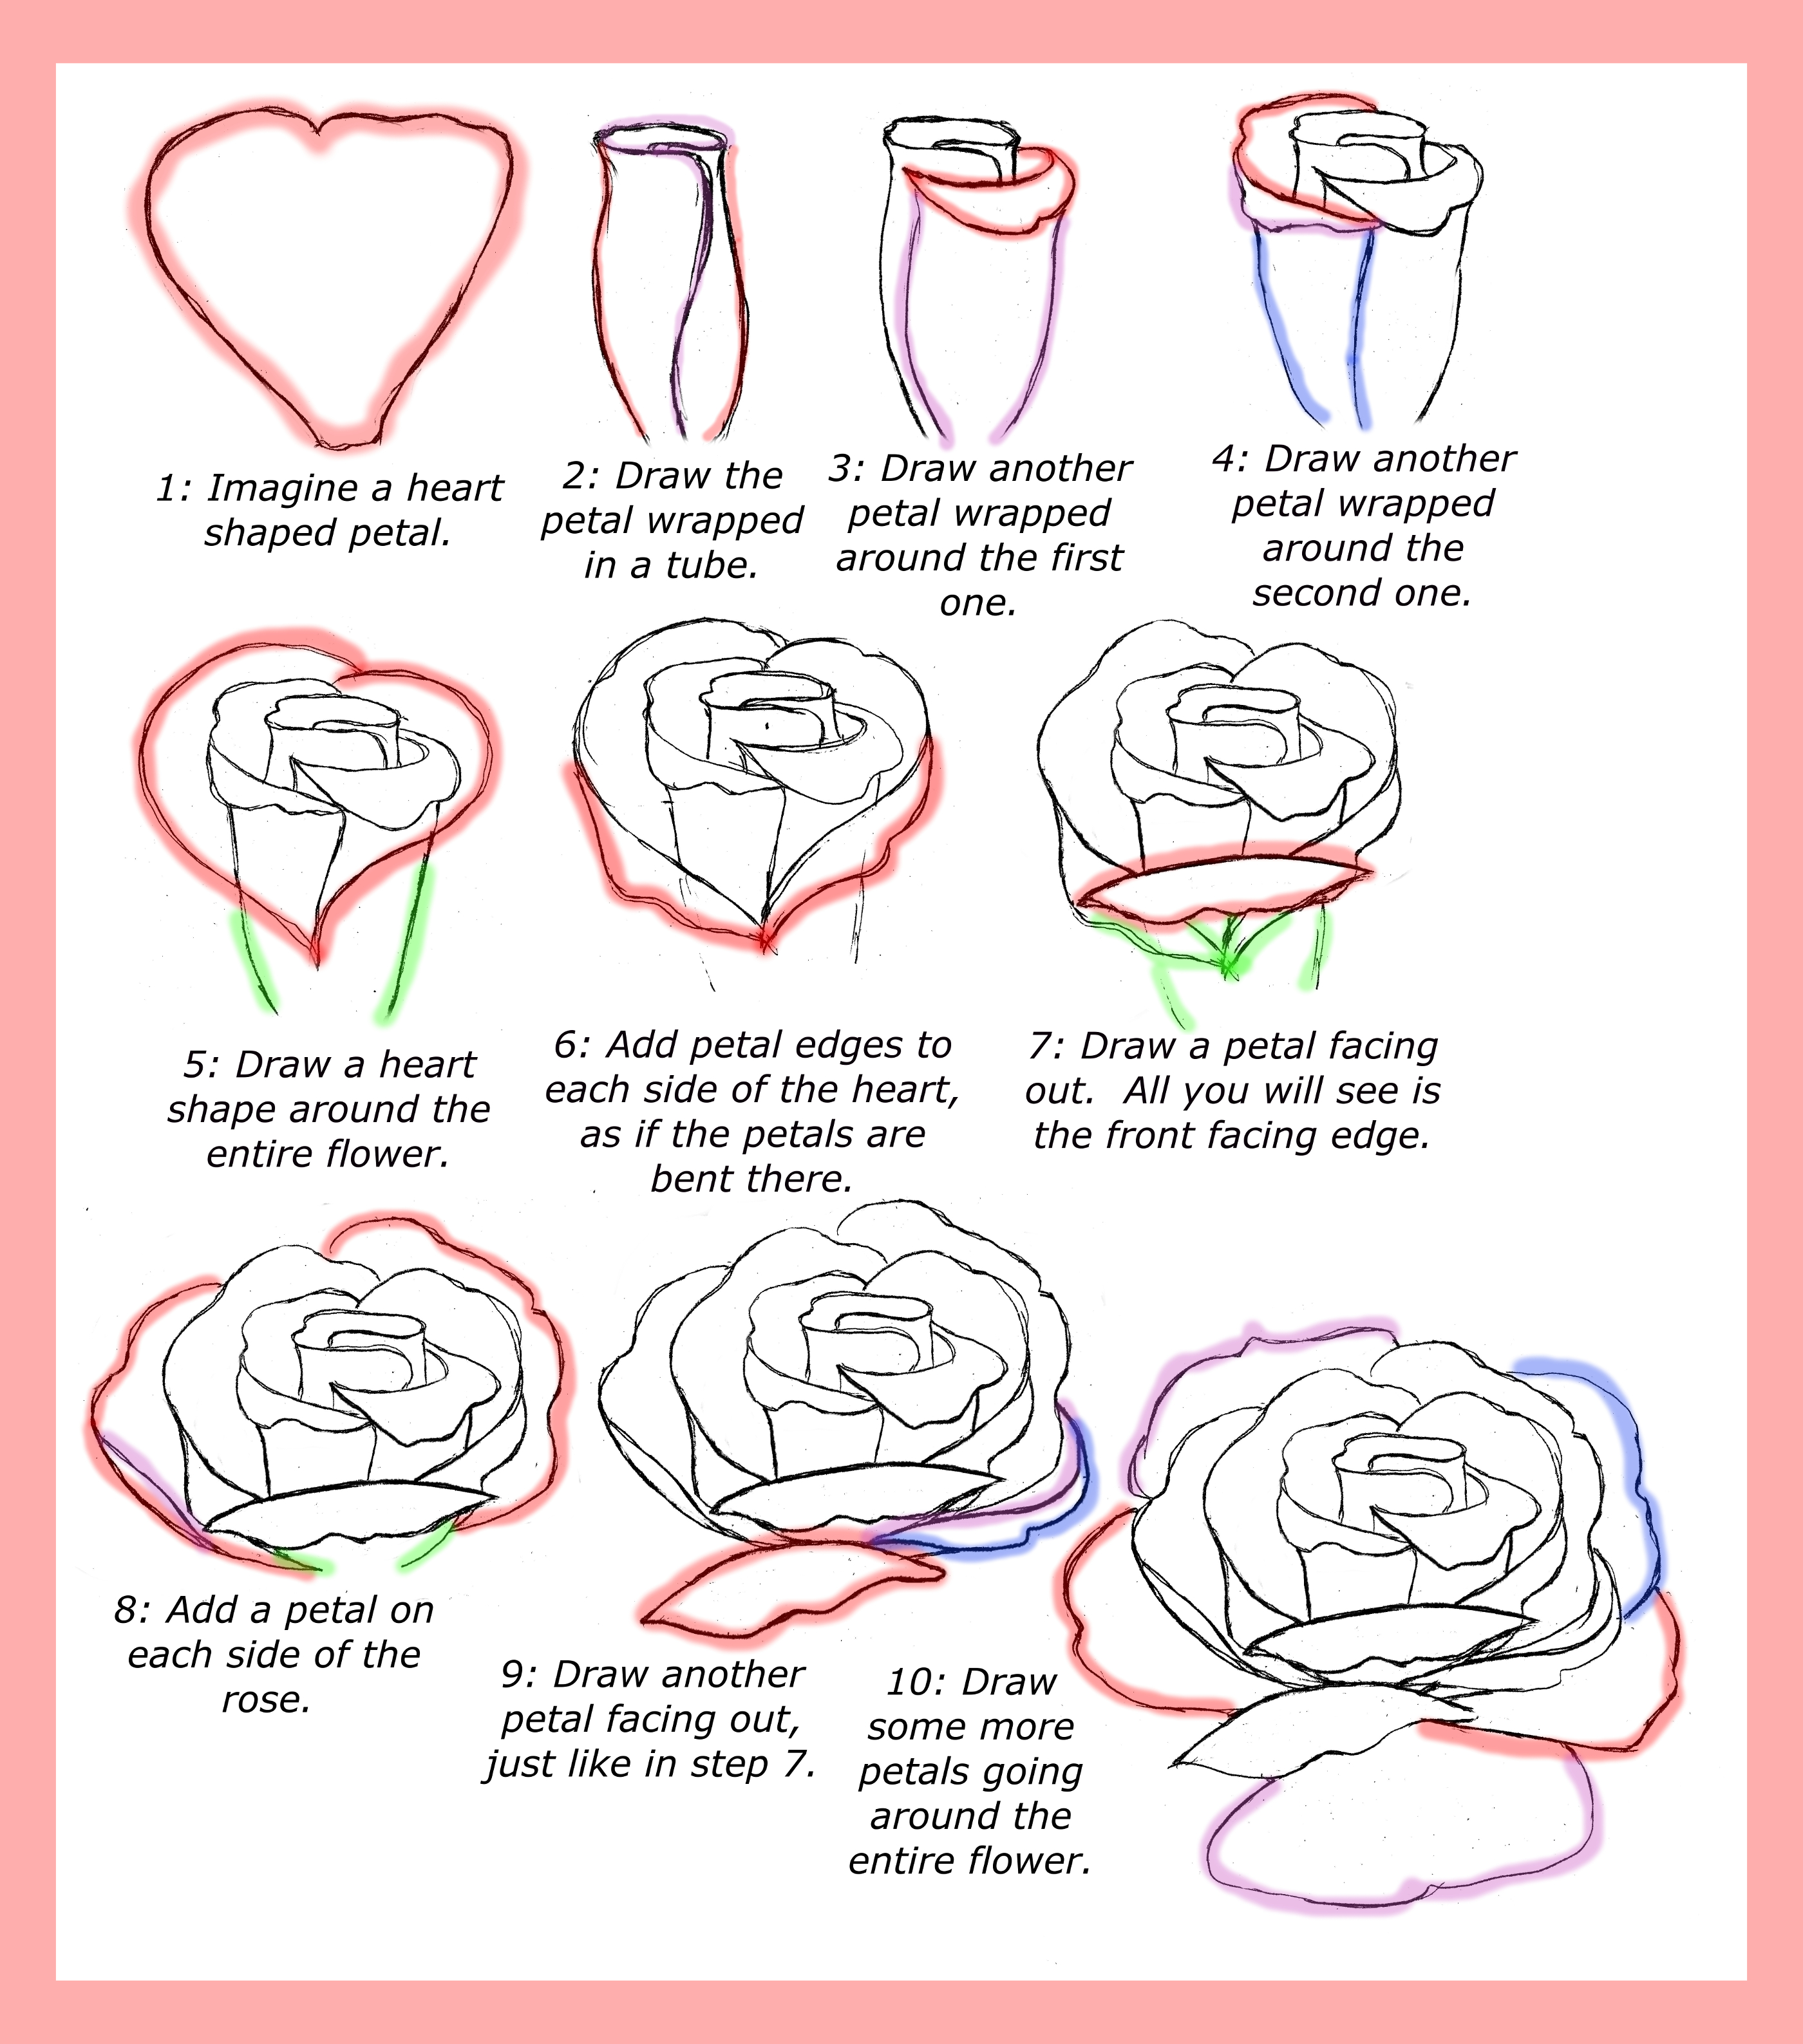
The first step to drawing a silver fern is to sketch out the basic shape. Start with a rounded triangle shape for the main body of the fern, then add smaller triangles for the individual leaves. Next, sketch out the vein structure of each leaf, being mindful of their placement and symmetry. Once you’re happy with the overall shape and structure, you can move on to shading and detailing.
When it comes to shading, it’s important to pay attention to the light source and create shadows and highlights accordingly. Use a blending tool or your finger to create a smooth transition between dark and light areas. For texture, you can create a rough, spiky effect by lightly sketching in small, pointed lines around the edges of the leaves.
Step-by-Step Guide to Drawing a Silver Fern
When I first set out to draw a silver fern, I was a bit intimidated. However, I found that with practice and following these steps, it became easier over time.

1. Start with a rounded triangle shape for the main body of the fern.
2. Add smaller triangles for the individual leaves.
3. Sketch out the vein structure of each leaf, being mindful of their placement and symmetry.
4. Shade the fern, paying attention to the light source and creating shadows and highlights accordingly.
5. Add texture by sketching in small, pointed lines around the edges of the leaves for a spiky effect.
Tips for Drawing a Realistic Silver Fern
One thing that helped me when learning to draw a silver fern was studying real-life examples. Taking a walk in nature and observing the ferns up close can give you a better understanding of the shapes and textures to incorporate into your drawing. Additionally, it’s helpful to practice with various shading and sketching techniques to find what works for you.
Practice Drawing Different Shapes and Sizes
Another helpful tip is to practice drawing different shapes and sizes of ferns. This can help you develop your own unique style and improve your overall skill level. Experimenting with different shading and texturing techniques can also help to make your ferns more interesting and dynamic.
Final Thoughts on How to Draw a Silver Fern
Drawing a silver fern may seem intimidating at first, but with a little practice and patience, anyone can learn to do it. Remember to take your time, study real-life examples, and experiment with different shading and texturing techniques to find what works best for you. Soon enough, you’ll be creating stunning silver fern drawings!
Q&A About Drawing a Silver Fern
Q: What Materials Do I Need to Draw a Silver Fern?
A: All you really need is a pencil, eraser, and paper. However, you may also want to use colored pencils or markers if you plan on adding color to your drawing.
Q: What Is the Most Challenging Part of Drawing a Silver Fern?
A: For many people, the most challenging part is getting the vein structure just right. It’s important to pay attention to the symmetry and placement of the veins, as this can greatly affect the overall appearance of the fern.
Q: How Long Will It Take to Learn to Draw a Silver Fern?
A: This varies from person to person, but with regular practice, you should be able to see improvement within a few weeks to a few months.
Q: Can I Use a Reference Image When Drawing a Silver Fern?
A: Absolutely! In fact, using a reference image can be very helpful when first starting out. Look for high-quality images that show the fern from different angles and in various lighting conditions to get a better sense of its shape and texture.
Conclusion of How to Draw a Silver Fern Step by Step
Drawing a silver fern is a fun and rewarding experience. By following these steps and practicing regularly, you can create stunning pieces of art that capture the beauty of this unique plant. Remember to take your time, study real-life examples, and experiment with different techniques to find what works for you. With a little patience and practice, you’ll be drawing fantastic silver ferns in no time!
Gallery
How To Draw A Fern

Photo Credit by: bing.com / webstockreview
Silver Fern Drawing | Free Download On ClipArtMag

Photo Credit by: bing.com / fern clipartmag
Silver Fern Pencil Illustration | Fern Tattoo, Pencil Illustration
Photo Credit by: bing.com / fern ferns illustrations repp
Silver Fern Pencil Illustration | Pre-Designed Photoshop Graphics

Photo Credit by: bing.com / ferns zealand repp tui silverfern
Silver Fern Pencil Illustration | Pencil Illustration, Silver Fern

Photo Credit by: bing.com / fern ferns reference